Generic howto for Allwinner devices
Legacy or current kernel ?
Many Armbian images come in two flavours : Legacy (using an older kernel version) and current (up-to-date LTS kernel). Depending on kernel version, the procedure to enable/disable features is not the same.
- Legacy kernel (5.4.x): DT (Device Tree) overlays
- Current kernel (5.10.x) : DT (Device Tree) overlays
Note: Support for older kernel versiones (like 3.4.x or 3.10.x) has been dropped.
What flavour am I using ?
Best way to know is by checking your kernel version :
| Text Only | |
|---|---|
1 2 | |
In this example the kernel version is 4.5.2 so you can use DT to tweak some settings. If you get a kernel version 3.X then you’ll be certainly using FEX like on an Orange Pi Plus 2E :
| Text Only | |
|---|---|
1 2 | |
Enable Hardware Features
Some boards require some manual configuration to turn on/off certain features. In some cases, the procedure is “less than obvious”, so we document some basic examples here.
How to reconfigure video output?
This affect current kernel only.
U-Boot supports HDMI and LCD output on Allwinner sunxi SoCs, LCD output requires the CONFIG_VIDEO_LCD_MODE Kconfig value to be set.
The sunxi U-Boot driver supports the following video-mode options:
monitor=[none|dvi|hdmi|lcd|vga|composite-*]- Select the video output to use
none: Disable video output.dvi/hdmi: Selects output over the hdmi connector with dvi resp. hdmi output format, if edid is used the format is automatically selected.lcd: Selects video output to a LCD screen.vga: Selects video output over the VGA connector.composite-pal/composite-ntsc/composite-pal-m/composite-pal-nc: Selects composite video output, note the specified resolution is ignored with composite video output.- Defaults to
monitor=dvi.
hpd=[0|1]- Enable use of the HDMI HotPlug Detect feature 0: Disabled. Configure DVI/HDMI output even if no cable is detected 1: Enabled. Fallback to the LCD / VGA / none in that order (if available) Defaults tohpd=1.
hpd_delay=<int>- How long to wait for the HDMI HPD signal in milliseconds When the monitor and the board power up at the same time, it may take some time for the monitor to assert the HPD signal. This configures how long to wait for the HPD signal before assuming no cable is connected. Defaults tohpd_delay=500.
edid=[0|1]- Enable use of DDC + EDID to get monitor info 0: Disabled. 1: Enabled. If valid EDID info was read from the monitor the EDID info will overrides the xres, yres and refresh from the video-mode env. variable. Defaults toedid=1.
overscan_x/overscan_y=<int>- Set x/y overscan value This configures a black border on the left and right resp. top and bottom to deal with overscanning displays. Defaults tooverscan_x=32andoverscan_y=20for composite monitors, 0 for other monitors.
For example to always use the HDMI connector, even if no cable is inserted, using edid info when available and otherwise initalizing it at 1024x768@60Hz, use: setenv video-mode sunxi:1024x768-24@60,monitor=dvi,hpd=0,edid=0.
Parameters regarding video must be saved into U-Boot environment file since they must be read before reading boot script. You can do this by adding saveenv command at the end of boot script (boot.cmd). Remember to recompile boot.cmd to boot.scr and note that changes will come into action after second boot.
Connect your LCD display
I tried three different display connection types: I2C, (4bit) parallel and SPI. All of them are working perfectly with my image. I didn’t took a picture of the third one. It’s a standard Hitachi HD44780 based 20×4 LCD, wired and tested according to wiringBP example.
I2C
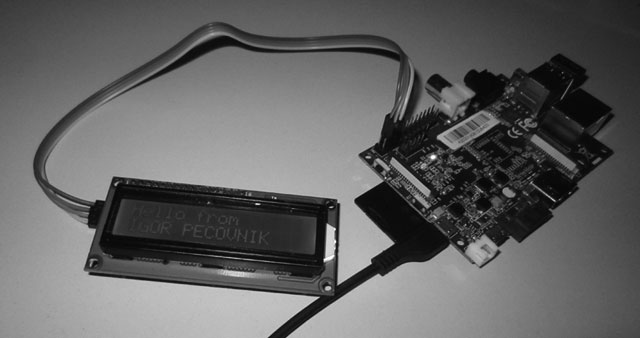
I am using this code for mainline kernel and with changed line: /dev/i2c-%u = /dev/i2c-2 for Legacy kernel.
SPI
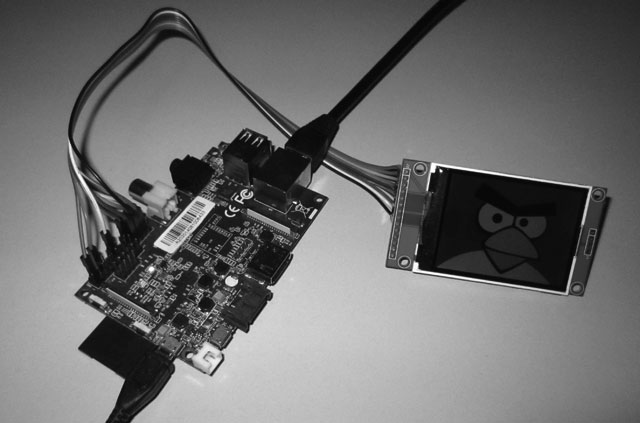
- I am using 2.4″ 240×320 SPI TFT LCD Serial Port Module+5/3.3V Pbc Adapter Micro SD ILI9341
- Wire according to this map.
- You have to use Armbian 1.5 or newer. Currently working only under Legacy kernel.
- Add this to your /etc/modules:
fbtft_device name=adafruit22a rotate=90 speed=48000000 fps=50 gpios=reset:25,led:19,dc:24 - Reboot
- Test – display some picture on the screen:
fbi -d /dev/fb2 -T 1 -noverbose -a yourimage.jpg
LVDS
Currently working only under Legacy kernel.
Image has pre-loaded settings for two LVDS display.
To enable 7 inch.
ln -sf /boot/bin/bananapilcd7.bin /boot/script.bin
To enable 5 inch.
ln -sf /boot/bin/bananapilcd5.bin /boot/script.bin
If you need touch screen support, add this module to your /etc/modules
ft5x_ts
Framebuffer
Linux Framebuffer drivers for small TFT LCD display modules.
FEX (outdated/unsupported, informational only)
Which file should I edit
Armbian embed a lot of BIN files, but a symlink point to the one in use :
| Text Only | |
|---|---|
1 2 | |
Updating a FEX
You may need to use sudo with all the following commands.
The whole process won’t overwrite any of your files. If you’re paranoid, you can make a proper backup of your BIN file :
| Text Only | |
|---|---|
1 | |
Then you can decompile your BIN into a FEX :
| Text Only | |
|---|---|
1 | |
Finally you can edit your FEX file with your favorite text editor and compile it back to a BIN :
| Text Only | |
|---|---|
1 | |
The last step is to change the symlink to use your custom BIN :
| Text Only | |
|---|---|
1 | |
H3 based Orange Pi, legacy kernel
Enable serial /dev/ttyS3 on pins 8 and 10 of the 40 pin header
Update the FEX configuration (which is compiled into a .bin) located at /boot/script.bin
Decompile .bin to .fex
| Text Only | |
|---|---|
1 2 3 | |
Edit .fex file
| Text Only | |
|---|---|
1 2 3 4 5 6 | |
Compile .fex to .bin
| Text Only | |
|---|---|
1 | |
Reboot
Notice that /dev/ttyS3 appears. That is your new UART device.