Armbian Getting Started Guide
Before you start, please make sure you have:
- a proper power supply according to the board manufacturer’s requirements
- a reliable SD card (at least ‘Class 10’ and ‘A1’-rated is highly recommended)
You will also need an existing operating system and an SD card writer tool. We recommend using Armbian Imager — the official Armbian flashing tool.
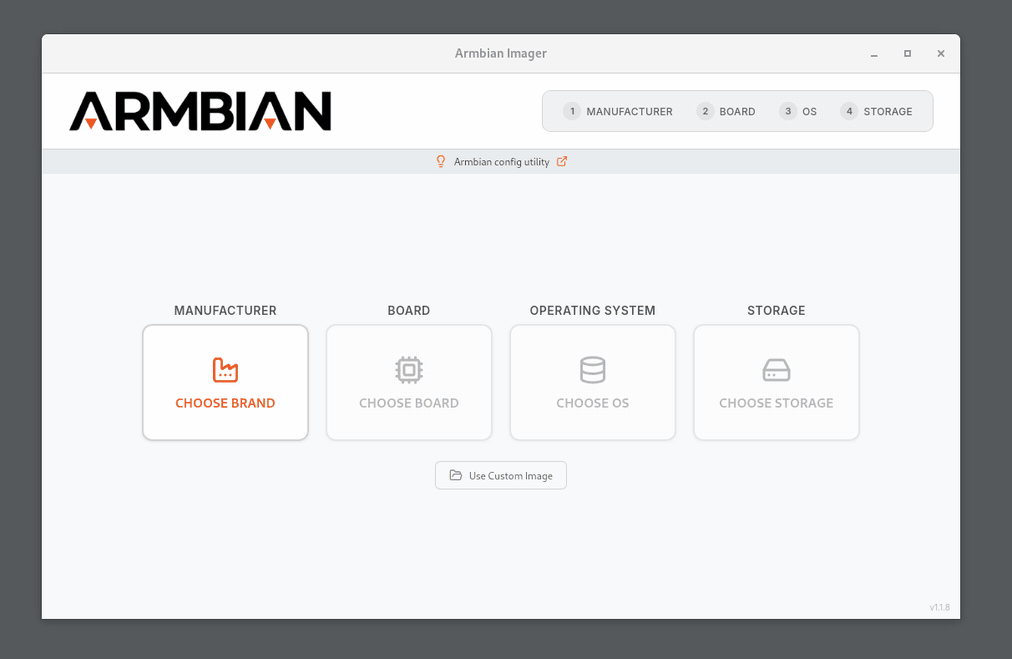
Armbian Imager is a lightweight, native flashing tool that supports both selecting and downloading an Armbian image before flashing, as well as flashing an already downloaded image.
Warning
Make sure you use a good, reliable and fast SD card. If you encounter boot or stability issues, in over 95 percent of all cases these are either caused by an insufficient power supply, or they are related to the SD card. This can be due to a bad card, bad card reader, something went wrong when burning the image, the card turns out to be too slow to boot, etc. Armbian can simply not run on unreliable hardware.
Checking your SD card with either F3 or H2testw is mandatory if you run into problems. Since counterfeit SD cards are still an issue, we also highly recommend checking your card with these tools directly after purchase.
Most SD cards are only optimised for sequential reads/writes as it is common with digital cameras. This is what the speed class is about. The SD Association defined Application Performance Class as a standard for random IO performance.
| Application Performance Class | Pictograph | Minimum Random Read | Minimum Random Write | Minimum Sustained (Seq. Write) |
|---|---|---|---|---|
| Class 1 (A1) | 1500 4k IOPS | 500 4k IOPS | 10MBytes/sec | |
| Class 2 (A2) | 4000 4k IOPS | 2000 4k IOPS | 10MBytes/sec |
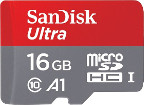
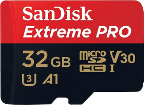
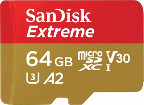
We recommend SD cards that are rated at least A1 and fulfill at least speed class C10 or higher (U1/U3, etc.). For example:
In case you chose an SD card that was already in use before, please consider resetting it back to ‘factory default’ performance with SD Formatter before burning Armbian to it (explanation in the forum). Detailed information regarding ‘factory default’ SD card performance.
New users
Some users might find it easier to follow this video tutorial.
Some word of advice, though. The video has been created a few years ago. You might therefore find differences between this video and our current site. So, in doubt, also follow the sections below while watching the video.
Download the image
If your hardware is supported, the recommended way to get started is to use Armbian Imager to select your board, download the appropriate image, and flash it in one step; alternatively, images can also be downloaded manually from https://www.armbian.com/download/ and flashed using Armbian Imager.
Debian or Ubuntu
If you have no special preferences or requirements, we recommend using an Ubuntu based Armbian image.
Minimal, Server, or Desktop
For each board, we usually provide these types of images:
- Minimal - lightweight CLI with only a bare minimum of packages and no graphical user environment
- Server - server variant with preinstalled standard utilities and no graphical user environment
- Desktop - full featured desktop image
For some boards we provide only minimal images due to their hardware limitations.
Vendor, Current, Edge, or Legacy
In some cases we provide images with different firmware. They differ in the level of hardware support and can be classified as follows:
- vendor contains a vendor-provided kernel which usually has the best hardware support while package version can be outdated, containing less general fixes
- current is following the latest Linux mainline LTS kernel and is in most cases the best choice.
Use the following images only if these are the only ones provided, or if you want to participate in testing:
- edge is, as the name implies, cutting-edge fresh / development / latest stable. It is only automatically tested, it can break at any time, and it is recommended only for experienced users.
- legacy is the old stable current kernel. Use it if current is not available or if something does not work well with it.
The level of kernel support, however, always depends on the board family. If in your specific case something does not work well, you are always free to try an image with another kernel included, or change the kernel with armbian-config.
Rolling releases
Rolling releases are suitable for Linux enthusiasts who want cutting edge packages and have the skills to fix the damage that a bad update might cause. If you want stability in a production environment or low headaches as a novice user, skip rolling releases. They are not at a suitable support quality level!
graph LR
  A[Hardware] --> B{Armbian kernel};
  B -->|legacy| C["rolling release"];
  B -->|vendor| C["rolling release"];
  B -->|current| C["rolling release"];
  B -->|edge| C["rolling release"];
  B -->|legacy| X["point release"];
  B -->|vendor| X["point release"];
  B -->|current| X["point release"];
  B -->|edge| X["point release"];


  C ---->|minimal| E[Debian or Ubuntu];
  C ---->|server| F[Debian or Ubuntu];
  C ---->|desktop| G[Debian or Ubuntu];

  X ---->|minimal| E[Debian or Ubuntu];
  X ---->|server| F[Debian or Ubuntu];
  X ---->|desktop| G[Debian or Ubuntu];
Danger
Do not use rolling release or edge images in a productive environment. Their purpose is testing and providing constructive feedback to developers.
Download and verification
After you have determined the image you want, the download for each image consists of three separate files:
- the .xz compressed image file
- the .sha file for download verification (optional)
- the .asc file for image authentication (optional)
After you have downloaded these files, we recommend checking the integrity and the authenticity of the compressed image file.
How to check the download integrity?
Since it might happen that your download got somehow corrupted, we publish a checksum/hash for each of our images. You can compare the image’s SHA-256 hash with the one contained in the .sha file.
On Windows, you can download and use the QuickHash GUI and follow the instructions in the gui. Linux and macOS users can simply do this in the directory with the compressed image and the checksum file:
| Bash | |
|---|---|
The integrity is verified if the output looks something like this:
| Bash | |
|---|---|
How to check the download authenticity?
All our images are digitally signed. It is therefore possible to check their authenticity. Linux and macOS user might need to install the required tools first: for Debian/Ubuntu, this can be done via sudo apt-get install gnupg, and for macOS use brew install gnupg. Windows users can install GnuPG from here. To check the authenticity, you will need the public key that was used to sign the images. This key can be retrieved from a keyserver or from the Debian/Ubuntu package repository (this step only needs to be done once):
To perform the verfification, run the command shown below.
| Bash | |
|---|---|
While the output can very depending on the GnuPG version, it should result in a response similar to the one below. It is safe to ignore the message WARNING: This key is not certified with a trusted signature!.
If something is wrong, the output will look something like this:
Deploy the image
There are multiple ways to deploy the image to your board. The easiest and most common option is to write the Armbian Image to your SD-Card.
Flash to SD Card
Use Armbian Imager to flash the image.
Armbian Imager can:
- download official Armbian images
- flash already downloaded
.img,.img.xz, or custom images - automatically verify written data
- protect your system disks from accidental overwrite
Steps:
- Install and open Armbian Imager
- Select your board or choose a local/custom image
- Select your SD card or USB drive
- Flash and wait for verification to finish
Other tools
We are aware that many programs can be used for this step. However, tools without proper verification and safe target selection can hide problems such as bad cards, faulty readers, partial writes, or accidentally selecting the wrong drive. These issues have caused too many avoidable error reports.
For this reason, Armbian Imager is the recommended tool.
Due to reports of image corruption caused by decompression issues, balenaEtcher is not recommended.
Flash to Internal Memory
Flash to Internal Memory allows you to write Armbian image directly to the device’s built‑in storage. This process completely replaces the existing system and erases all current data on the target drive. Use with caution, as once started, the operation cannot be undone.
Rockchip
When a Rockchip device is placed into Maskrom mode, you can use rkdeveloptool to flash an image directly to its internal storage (eMMC, UFS, or SPI) over USB.
Install requirements for rkdeveloptool
| Bash | |
|---|---|
Download & Compile rkdeveloptool
| Bash | |
|---|---|
Optionally install rkdeveloptool systemwide:
| Bash | |
|---|---|
First make sure you have brew installed. Then you can run the following commands to install rkdeveloptool:
Install requirements
| Bash | |
|---|---|
Download & Compile rkdeveloptool
| Bash | |
|---|---|
Optionally install rkdeveloptool systemwide:
| Bash | |
|---|---|
- Connect & Boot your Board into Maskrom mode. Usually there is a button to hold for 5 seconds during boot else check your manufactures website.
- Run
rkdeveloptool ldto list all connected devices - Extract your image
unxz Armbian-YourBoard.img.xz - Flash the RK3XXX_loader.bin (check your SoC) via
rkdeveloptool db RK3XXX_loader.binwhich stands for download boot - Erase the current storage medium (usually EMMC) via
rkdeveloptool efwhich stands for erase flash - Now you can flash the extracted image with
sudo rkdeveloptool wl 0 Armbian-YourBoard.img(make sure the file ends with .img) - Reboot your board with
sudo rkdeveloptool rdwhich stands for (power) reset device
First boot
If you used an SD card insert it into a slot and power on the board. With the cheapest board, the first boot (with DHCP) can take up to two minutes with a class 10 SD card.
First login
The first boot will log you in automatically if you have connected a display via HDMI or if you are connected to the serial console. For SSH, you need to login as root and use the password 1234. If you need to find your board’s IP address, you can use this tool.
After logging in, you will be prompted to change the default password. You will then be asked to create a normal user account that will have sudo permissions. Beware, at this stage, the keyboard is using the QWERTY layout. In case you have no wired network connection and there is a wireless adaptor detected, the system will prompt you to connect.
| Text Only | |
|---|---|
1 2 3 4 5 6 7 8 9 10 11 12 13 14 15 16 17 18 19 20 21 22 23 24 25 26 27 28 29 30 31 32 33 34 35 36 37 38 39 40 41 42 43 44 45 46 47 48 49 50 51 | |
Automated config
These settings can be pre-loaded, see Autoconfig
First steps
You can customize your Armbian Linux before or after installing it onto your device’s hard-drive. In many cases, you probably want to apply some basic customizations like adjusting the keyboard layout, the timezone, etc., so you can use the same SD card again if necessary. Or you want to adjust your system or hardware configuration or install preconfigured applications and advanced services.
Please note that the typical tool for all tasks is armbian-config. The section Advanced Configuration contains a selection of tasks that require a deeper understanding of the operating system.
Configuration
Typical tasks include for example:
- Set the default language and keyboard layout
- Disable or enable root logins and/or SSH
- Handle and configure system and firmware upgrades
- Configure the network
Software titles
You can quickly and easily install popular software too! It is ready to run and optimized for Armbian. Here are few highlights:
- Desktops - install desktop environments
- Netconfig - network tools
- DevTools - development
- Benchy - system benchmaking and diagnostics
- Containers - containerization and virtual machines
- Media - media servers and editors
- Management - remote management tools
Installation
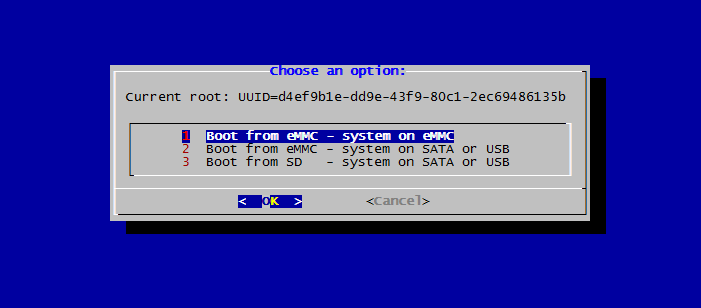
At this stage, nothing has been installed onto the board’s internal drive yet. Using the installer, one can now decide where to install the boot loader and the rest of the system. The installer supports various combinations depending on the availability of onboard eMMC and/or attached SATA, NVME, or USB storage.
Armbian Installer support those storage scenarios:
- boot from SD, system on SATA / USB
- boot from eMMC / NAND, system on eMMC/NAND
- boot from eMMC / NAND, system on SATA / USB / NVME
- Boot from SPI - system on SATA, USB or NVMe
- Install/Update the bootloader on SD/eMMC
- Install/Update the bootloader on special eMMC partition
- Install/Update the bootloader on SPI Flash
- Install system to UEFI disk
Start the install script, make your choice, and follow the instructions:
| Text Only | |
|---|---|
1 | |
After you have decided for an option, you can choose between the following file systems:
- ext2,3,4
- btrfs
For novice users, a sensible default is ext4.
Congratulation. You have successfully installed Armbian onto your board!
Update the system
The operating system consists of two parts that must be updated separately.
Update the Armbian OS
For the base operating system, use the APT package manager to keep the packages up to date.
| Text Only | |
|---|---|
1 2 | |
The Update process can take quite some time in case you are using an old or a cheap SD card and/or experience heavy load.
Users with a desktop will find graphical tools that allow one to update the system packages without using the command line.
Armbian provides a firmware package freeze feature to provide you with the possibility to upgrade all packages but the firmware. This prevents unpleasant surprises on functionality regressions that can come with kernel upgrades. To enable or disable this feature, look for
| Text Only | |
|---|---|
1 | |
within armbian-config.
If the kernel was upgraded during this process, you will be prompted to reboot at the next login.
Upgrade the Armbian OS
When a new major release of Debian or Ubuntu is out, we recommend to start with a fresh image. While it is possible to do what is called a “dist-upgrade”, the process is largerly in the domain of the underlaying Debian or Ubuntu user space. We provide only an experimental Distribution upgrades feature for armbian-config.
Userspaces distribution upgrades are neither tested nor supported. Therefore Armbian cannot provide any support if something goes wrong.
Update the boot loader
The second part that can be updated is the boot loader.
First, update all packages as described in the previous section. Then run:
| Bash | |
|---|---|
and select:
| Text Only | |
|---|---|
1 | |
Troubleshooting
If you experience an issue during any of the steps mentioned in this section, please first check out our Troubleshooting and Recovery guide.
How to report bugs
If you are certain you have found a bug, fill out our bug reporting form and follow its instructions to collect the necessary information and how/where to provide them depending on the type of issue. Please understand that any reports lacking these fundamental diagnostics might be ignored.