Fixed and wireless network settings
Basic setup
Basic network setup
graph LR
  A{Select interface} --> B[Configure];
  A{Select interface} --> C[Drop];
  C ---->A;
  B -->F[DHCP];
  B ---->G[Static];
  G ------>| MAC, IP, route, GW, DNS|H[Configured];
  F -->| MAC | H[Configured];
Edit: footer header
Status: Stable
Architecture: x86-64 aarch64 armhf riscv64
Maintainer: @armbian
Documentation: Link
armbian-config --cmd BNS001Select Interface:
Choose the desired network interface, such as:
eth0for wired Ethernetwlan0for wireless connections
If selecting a wireless interface:
- A list of available Access Points (APs) will be displayed.
- Select your preferred AP and enter the password when prompted.
- Leave the password field empty for open networks.
IP Address Configuration:
Choose between:
- DHCP (Dynamic Host Configuration Protocol):
Automatically assigns an IP address.
- Static IP:
Manually enter the following details:- MAC Address (optional): Specify if you want to spoof the MAC address.
- IP Address: Use CIDR notation (e.g.,
192.168.1.10/24). - Route: Default is
0.0.0.0/0. - Gateway: Typically the router’s IP (e.g.,
192.168.1.1). - DNS: Default is
9.9.9.9, but you can specify another.
Finalize Configuration:
- Review and confirm your settings.
- The system will apply the configurations.
- Your network connection should then be fully established.
If you experience issues or prefer full control, follow the manual networking setup guide.
| Remove Fallback DHCP Configuration: | |
|---|---|
View configuration
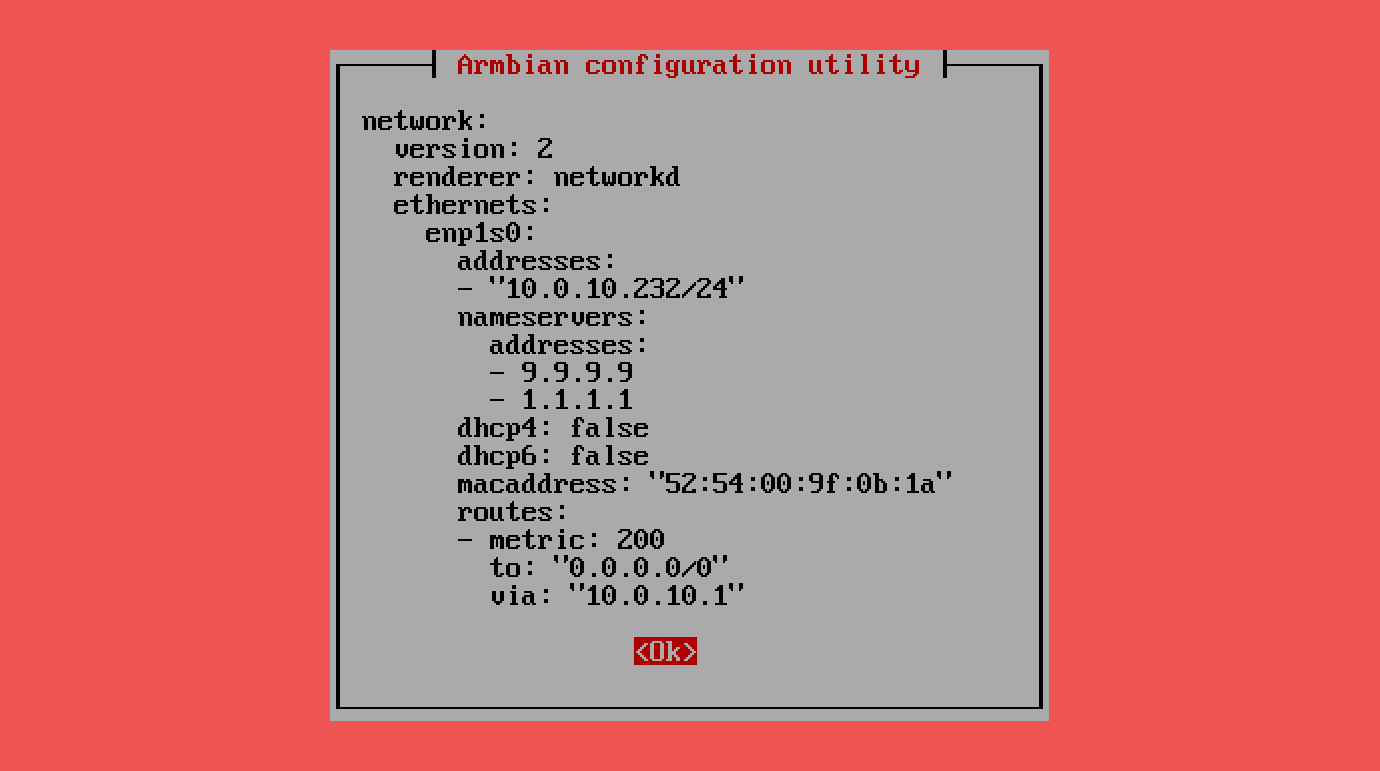
View Network Configuration
View Network Configuration allows you to display the system’s active network settings as a Netplan YAML configuration. This shows interfaces, IP addresses, gateways, DNS servers, and other networking details in a clean, human-readable format. Useful for verifying, troubleshooting, or manually editing network setup on systems that use Netplan for managing network interfaces.
Edit: footer header
Status: Stable
Architecture: x86-64 aarch64 armhf riscv64
Maintainer: @armbian
Documentation: Link
armbian-config --cmd VNS001Advanced
Advanced bridged network configuration
Edit: footer header
Architecture: x86-64 aarch64 armhf riscv64
Maintainer: @armbian
Documentation: Link
Add or Change
Add / change interface
graph LR
  A[Network] --> B[Add / Change interface];
  A[Network] --> O[Revert to defaults];
  A[Network] --> P[Show configuration];
  B ---->E[Wired];
  B ---->F[Wireless];
  E -->R[DHCP];
  E -->T[Static];
  E -->S[Spoof MAC];
  F -->X[Station];
  F -->W[Access point];
Edit: footer header
Status: Stable
Architecture: x86-64 aarch64 armhf riscv64
Maintainer: @armbian
Documentation: Link
armbian-config --cmd NEA002In order to configure your network devices, they need to be supported the kernel.
To verify, use command:
| Bash | |
|---|---|
It is usually something like eth0, enp4s3 or lan.
In order to configure your wireless network devices, they need to be supported the kernel.
To verify, use command:
| Bash | |
|---|---|
It is usually something like wlan0, wlo1 or wlx12334c47dec3. If you get blank response, it means your WiFi device / dongle is not supported by the kernel.
| Revert to Armbian defaults: | |
|---|---|
| Show configuration: | |
|---|---|
| Show active status: | |
|---|---|

