Networking
Armbian uses Netplan.io to describe networking configurations. Netplan is a utility to easily configure Linux networking, using a declarative approach. If you want to configure your network manually, it is as simple as editing and creating Netplan yaml files (see the yaml configuration reference at the Netplan docs).
Netplan is used to configure networks on all Armbian images since Release 24.05, no matter if minimal, CLI or desktop, Debian or Ubuntu. However, the networking backends are different based on if you choose a minimal image or not.
Minimal images
Netplan renderer: networkd
Minimal images are using the systemd-networkd backend, which has a smaller footprint compared to Network-Manager which is used in all non-minimal images. systemd-networkd is a system daemon that manages network configurations. It detects and configures network devices as they appear; it can also create virtual network devices. This service is great for simple connections, but can also be useful to set up complex network configurations.
Armbian defaults
All ethernet interfaces are configured for DHCP and will automatically receive an IP address from your router.
/etc/netplan/10-dhcp-all-interfaces.yaml:
| YAML | |
|---|---|
Configuration examples
Setting a fixed IP address
When creating an additional .yaml file be sure to remove the default file (/etc/netplan/10-dhcp-all-interfaces.yaml) as the default will overide.
The following example configures a static IP 192.168.1.199 for the eth0 interface. Please adjust as necessary.
How to find your device’s Ethernet interface?
Use command:
| Bash | |
|---|---|
eth0, enp4s3 or lan.
/etc/netplan/20-static-ip.yaml:
| YAML | |
|---|---|
See also the Netplan docs for reference.
Connecting to WiFI network
It is recommended to make a separate config file for wireless network.
Create the following file:
sudo nano /etc/netplan/30-wifis-dhcp.yaml:
| YAML | |
|---|---|
Replace SSID with the name of the network you want to connect to and wlan0 with the wifi interface used on your system.
How to find your device’s WiFi interface?
Use command:
| Bash | |
|---|---|
wlan0, wlo1 or wlx12334c47dec3. If you get blank response, it means your WiFi device / dongle is not supported by the kernel.
See also the Netplan docs for reference.
Applying your configuration
Once you are done configuring your network, it is time to test syntax and apply it.
Fix file permissions
According to the Netplan docs, the permissions must be restricted to the root user.
| Bash | |
|---|---|
Test syntax
This will verify the syntax and test if your device can connect
| Bash | |
|---|---|
Apply the configuration
| Bash | |
|---|---|
CLI and desktop images
Netplan renderer: Network Manager
Server CLI and desktop images are using the Network-Manager backend. You can use similar methods for configuring your network as with the networkd backend used on minimal images.
Setting a fixed IP address
The following example configures a static IP 192.168.1.199 for the eth0 interface. Please adjust the example to your likings.
How to find your device’s Ethernet interface?
Use command:
| Bash | |
|---|---|
eth0, enp4s3 or lan.
/etc/netplan/20-static-ip.yaml:
| YAML | |
|---|---|
See also the Netplan docs for reference.
Alternatively, you can also use Network-Manager directly via the command line or GUI tools on your desktop:
| Bash | |
|---|---|
Display screenshot
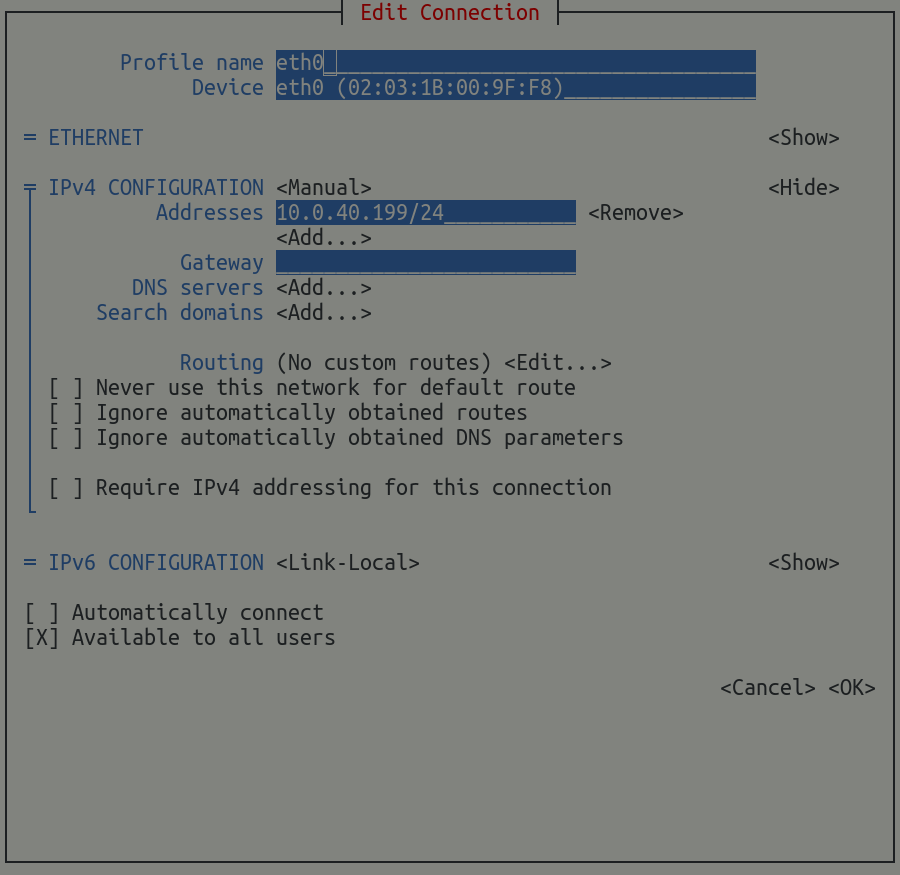
Replace eth0 with the name of your Ethernet Interface.
Connecting to WiFI network
For connecting to a wireless network, you can use the same method as mention above for use with networkd on minimal images. Just make sure to replace renderer: networkd with renderer: NetworkManager.
Alternatively, you can also use Network-Manager directly via the command line or GUI tools on your desktop:
| Bash | |
|---|---|
Display screenshot
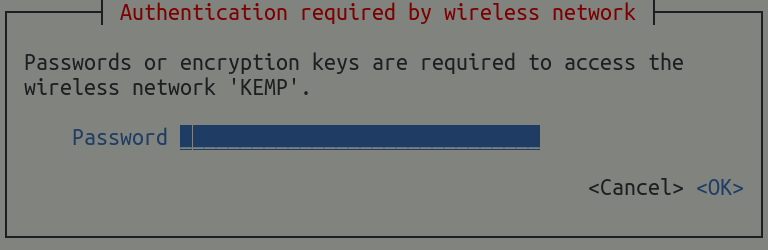
Replace SSID with the name of your wireless network.